Getting Started
DVC's ImageJ camera controller plugin enables capturing snapshots or previewing live video from any of DVC's cameras. With the option to execute ImageJ macros, complex-imaging tasks can be scripted and executed using a single function key or one of the user-programmable macro buttons.
Installation
If DVC's camera software has not been installed, download and install the current release. If ImageJ has not been installed, download and install a copy from here.
To install the ImageJ plugin, go to the [HomeDrive]\DVCCo\ImageJ\plugins folder and copy the DVC subfolder to the [ProgramFiles]\ImageJ\plugins folder and launch ImageJ.
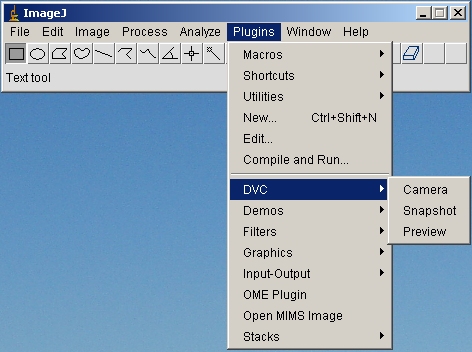
To open the camera controller, select ImageJ's Plugin menu and click on the DVC->Camera option.
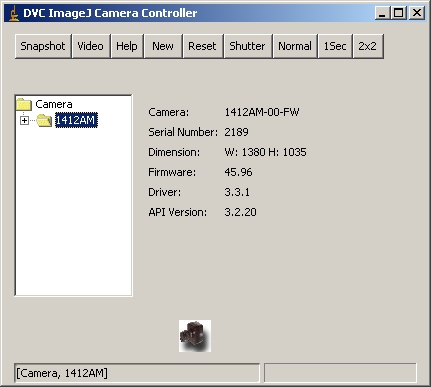
To capture a single image, simply press the Snapshot button and to view live video, press the Video button. Both of these open an image window with the captured image. The camera icon above the status bar changes while acquisitions are in progress. During live video, the status bar displays the frame rates for both the acquisition and ImageJ's display.
Launching the camera controller from the ImageJ icon
To launch the DVC Camera Controller from the ImageJ desktop icon, create a text file in the macros folder [ProgramFiles]\ImageJ\macros named DVC.txt and enter a single line,
run(“Camera”);
Next edit the [ProgramFiles]\ImageJ\ImageJ.cfg and append the 3rd line to read;
.
jre\bin\javaw.exe
-Xm512m –cp ij.jar ij.ImageJ DVC.txt
